Monday, 24 February 2014

Contouring 101

One of the questions I get asked the most as a makeup artist has to be 'How do I contour?' or sometimes 'What is contouring?!' so I thought I would explain all in a lil blog post for y'all.

Contouring has always been a part of makeup artistry, and it basically consists of highlighting certain areas of the face to draw attention to them and make them appear fuller, and shading contrasting areas to make them appear slimmer or more chiseled. It is a great way to get instant cheekbones or sharper definition to a soft jawline, and can instantly slim down the face. You can do this with highlighting or contouring products, or you can use different colours of full coverage foundation (a shade lighter and a shade darker than your skin tone) and blend them together, a method which found fame again recently thanks to Kim Kardashian. I'm sure everyone ever has seen this photo...


Which basically explains how her makeup artist applies her makeup before blending it in. In this article I will be focusing more on the other method, as this is the one that I always use when shooting or doing clients. It looks great on camera and is super easy to do at home as well. If you are a grab-and-go girl then contouring may not be for you as it takes a little time, but I definitely recommend trying it for the evening or when you have a bit more time for your makeup.

So, firstly you want to choose your products carefully. I have tried to choose products here that are fairly universal and will suit any skin tone. Also, I would advise using makeup brushes as they have better precision and will blend the products far better.

The first way you can do this is with cream products, great for a dewy, more natural look and easy to blend. This is also good for a drier or more mature skin as it avoids ageing the skin with lots of powder. I am using Benefit's High Beam to highlight and By Terry's Hyaluronic Summer (a matte, mousse bronzer) in Shade 1 Fair Tan to contour (darker shades are available).

Duo fibre brushes are the best for blending


I always start with highlighter. You want this dotted all over the areas you want to emphasise, so cheekbones, browbones, forehead, the tip of the nose, cupid's bow and chin. Blend this in in circular motions.

After blending, dab the contour under your cheekbones, along your jawline and into your temples. You can also put a little product down the sides of your nose if you want it to appear slimmer. Again, blend in circular motions, but this time make sure you blend into the highlighter, creating a seamless finish that flows. No harsh lines!

Here is an image of how it should look. I have left both products unblended to make it clearer.

Lol


The other way that you can do this is by using powders, which are better for a longer lasting finish and great for a more matte effect on the skin. I am using the Kevyn Aucoin contour duo in Candelight to highlight, and Sculpting Powder to contour which are just about the best contouring products I have ever used because the colour pigments are so fine, they look just like skin, and not at all makeup-y.

The new Kevyn packaging has no brushes so I recommend one like this bad boy


Candelight is extremely easy to work with and can be swept onto all the areas I just mentioned should be highlighted. Do try and use a small fluffy brush however, you don't necessarily want shimmer everywhere. I always use this brush which I think is from YSL years ago.

When contouring, I find that it's better to stipple the product into the skin, dabbing the brush where you want the product and building it up naturally. Then, softly feather the powder into the highlighter and blend away any harsh lines. Choosing a contouring powder is extremely difficult as many of them tend to come up a bit orange on the skin, but this one looks completely natural due to its matte taupe shade.

Stand back and admire your handiwork!

Here's some I made earlier...

Using powders

Using creams. Also good for boys = looks less makeup-y


Here are some golden rules to remember:

1) Always use a brush
2) Start with a tiny amount of product and build it up. Its much easier to add than to take away
3) Highlighters should always be shimmery/light-reflecting, contours should always be matte
4) Stop and check your progress as you're going
5) If you're going somewhere dark, like a club, you can go for it as your makeup looks more toned down in the dark. If you're out in broad daylight, you probably want to keep this softer!

How to Clean Your Makeup Bushes

When it comes to brush cleaning, most people are either angels or mingers. Angels religiously clean their brushes weekly, which is obviously awesome as it prevents the brushes getting claggy and gross and a build-up of bacteria from giving you spots. About 0000000.1% of people do this. Well done you, feel smug, top marks.

For all you mingers out there, leaving your makeup brushes looking like this...


From Google Images

..is probably an all too familiar sight and it is NOT OKAY. This is especially true in regards to brushes for liquid products such as foundation and concealer. These makeup products are moist and sticky and basically hold a bacteria party on your brushes.

Everyone is invited to this party, including dust, dirt and germs. Yum.

Laziness is not an excuse, as cleaning them is super easy and takes about two minutes max, and you don't need any special equipment. Plus, if you wash and dry them correctly and your brushes are of a reasonable quality, they will last for years and years. If you have invested in nice brushes you have even more reason to look after them as brushes from a top quality brand can last a lifetime.

So. Let's get started.

All you need is a bathroom sink, some hand soap or shampoo and some loo roll. If you are cleaning some extra grimy brushes, you may also need a bit of olive oil or bath oil to loosen the stubborn dirt.

1) Squirt your soap or shampoo into the palm of your hand. Run the tap and hold the brush under the tap to moisten it.
2) Swirl the wet brush into the palm of your hand, into the soap. Keep swirling the brush  until a lather has formed and the soap has gone.
3) Rinse under the running tap. If the brush is still dirty, repeat 1 and 2 and use the oil instead of soap. This is good for foundation, concealer or lip brushes.
4) When the brush is clean, gently squeeze as much water as you can out of the brush with your fingers. Emphasis on gentle, don't pull the hairs out.
5) Wave the brush around in the air like a mad person to get rid of more water.
6) Take one square of loo roll like so.


Fold it in half to make a triangular-ish shape


Roll the brush up in the loo roll so it looks like this


Leave overnight, pointing downwards at an angle, so that the remaining water doesn't run into the brush. This will rot the wood or loosen the glue that holds the brush together


Step six is a great tip I learnt from a guest lecturer at uni, it keeps the bristles in perfect condition and stops the brush getting old and splayed.

There you have it. Easy. I recommend doing this once a week with your foundation and concealer brushes. For powder brushes, you can be a bit lazier. Do them at least once a month, if not fortnightly.

There is a Vogue article on brush cleaning here which made me giggle.


Wednesday, 19 February 2014

Winter, Give Me My Glow Back!

Whilst I am not blessed with a golden skin tone, I do believe that it's possible to have healthy, luminous skin whatever your colouring. When it comes to being pale, I reckon I could give Wednesday Addams a run for her money. Therefore I do know a thing or two about products that give you a little bit of life back in your skin, even in the middle of chilly February. This is also a combination of products that I often use on myself and on shoots, it looks really natural and fresh, and also photographs really well.


1) Laura Mercier Radiance  Foundation Primer £29


This is a really beautiful foundation primer that can be worn under makeup or by itself if you're having a good skin day and just need a bit of brightening up. The texture is fairly light and super blendable, I personally like applying it with a brush but by all means you could use your fingers if you prefer. The pinky undertone flatters almost all skintones and the light reflecting pigment instantly gives you a luminous glow. Plus, it's silicone-free so it won't block your pores, yay! Although this is one to avoid if you are concerned about fine lines or large pores, I would recommend it to pretty much everybody else. Gorgeous!

2) By Terry Light Expert (I use Shade 1, Rosy Light) £45


I was never very excited about this product until I actually tried it, and then I got very, very excited about it because it's lovely. It's a sheer to medium coverage base from Terry de Guntzberg (the creator of Touch Eclat for YSL, dontcha know) which also brightens and perfects the skin. It doesn't really look or feel like you are wearing makeup, which is always good in my book, as your base should be a perfect match for your skin tone and type. I was a bit worried at first as the product doesn't look anything like your skin colour, (this shade is a rosy pink) but it blends perfectly and adjusts to your skin tone. The pen applicator is extremely handy, perfect for handbags and travelling. The brush is actually antibacterial as well, so no need to worry about washing brushes.

3) Nars Radiant Concealer (I use Shade 2, Vanilla) £21


When to comes to concealers, this is hands down my new favourite.It's a fairly new product, having only been out for about 6 months but there has already been a lot of positive press on this one, and for good reason. It is INCREDIBLE on dark circles. Emphasis on incredible, it really does disguise them. It also has a lovely creamy, vitamin-rich formula making it nourishing and hydrating for the under eye area. I also dab this on my nose, chin and corners of the mouth to prevent any redness during the day. Unlike lots of concealers, they are natural enough that they can be worn with no other makeup, and there is a great range of shades for all skin tones, as you would expect from Nars.

4) Becca Shimmering Skin Perfector in Topaz £33


If you are going to buy one thing from this article, buy this because it really is such a great product. The Skin Perfectors are one of Becca's  signature products and come in liquid and powder form. I like liquid personally, they can be worn over or under makeup and are nice and hydrating this time of year (also, they're SPF 25). I've been using Topaz, the darkest shade, as a liquid bronzer, contouring my cheeks, jawline and temples and then brushing a little over the rest of my face. Darker skintones can actually highlight with this, the golden undertone of the product looks really beautiful. Top marks and a new staple in my makeup bag and my kit.


The overall look here is pretty natural and fresh, great for everyday makeup. I often adjust this for evening just by using a slightly heavier base. I've finished of with a teeny  bit of mineral powder on my T-Zone, liner, mascara, brows and lip balm.


Friday, 31 January 2014

La Belle Dame


Photography: Laura Coughlan
Styling: Allison Hayes
Makeup/hair: Me
Model: Shree @ Lenis

Sweetness and Delight for Turn Magazine


Photography: Laura Coughlan 
Styling: Allison Hayes
Makeup/hair: Me
Set Design: Julia Salotti
Model: Cammie @ Lenis

Sunday, 5 January 2014

Long Hair, Don't Care

Happy New Year! I do hope you all had a gudden. Guess what my New Year's Resolution was? To get back to blogging, it's been far too long.


First post of the year will be haircare based; as the holiday period can be a bit of a nightmare in terms of damaging your tresses, I thought I'd mention some styling saviours which are both effective at styling AND nourishing long hair. The products that I'll talk about are ones I use personally and I have found to be extremely effective. My hair is quite long now, so keeping it healthy and nourished is definitely a priority.


1) Phyto Subtil Elixir Oil - £24.50


This pre-shampoo treatment oil is absolutely fab at giving your hair back all the nourishment that your styler fried out of it. I've found the best way to use it is to comb it through the legnths of your hair , avoiding the roots (use a lot if you have thick hair, err on the side of caution if your hair is fine). Braid your hair, and leave overnight to give the oil a chance to really soak in and do it's thaang (it won't stain your sheets, don't worry). This does it for me over other oils because it's silicone free, which means it won't weigh your hair down, AND it's also about 96% natural botanical oils. Shampoo out in the morning, follow with a teeny bit of conditioner, et voila.


2) Toni and Guy Prep Heat Protection Mist - £6.30


Heat protection is definitely a must for all hair types, as it not only protects from styling, but also from some environmental stressors. This one is anti-static and detangling to help prevent further damage, and it's a brilliant price point. I use this every time I wash my hair, even if I don't use a heated styler, just to give my hair a bit of extra protection out in the big wide world.


3) Phyto Phytomist - £15


Notice a bit of a theme here?! Phyto really do make great haircare products, and this one I think I have actually written about before. It's a leave in, colour-protecting, detangling conditioner. Spray all through the legnths of your hair while it's still damp, and comb through with a Tangle Teezer or wide toothed comb. I love this because my hair is extremely knotty, as in if I go out without a hairbrush it all kind of turns into a weird dreadlock. Yum. Again, its pretty natural and silicone-free, and so good for glossiness and shine. I'm onto my third bottle now, which is testament to its awesomeness.


4) Blowpro Body by Blow No Crunch Volumising Mousse - £10.99


 I picked this up accidentally in Superdrug because I needed a mousse and it was on offer, and actually I am really quite impressed with it. It basically does what it says on the bottle, which is exactly what I wanted. It feels lovely in your hair, with no residue and no crunchiness, but lots of volume and shine. Plus, it has UV filters to protect your colour and a protein complex to stregnthen. I would definitely repeat buy this.


Tuesday, 27 August 2013

Cheap Treats


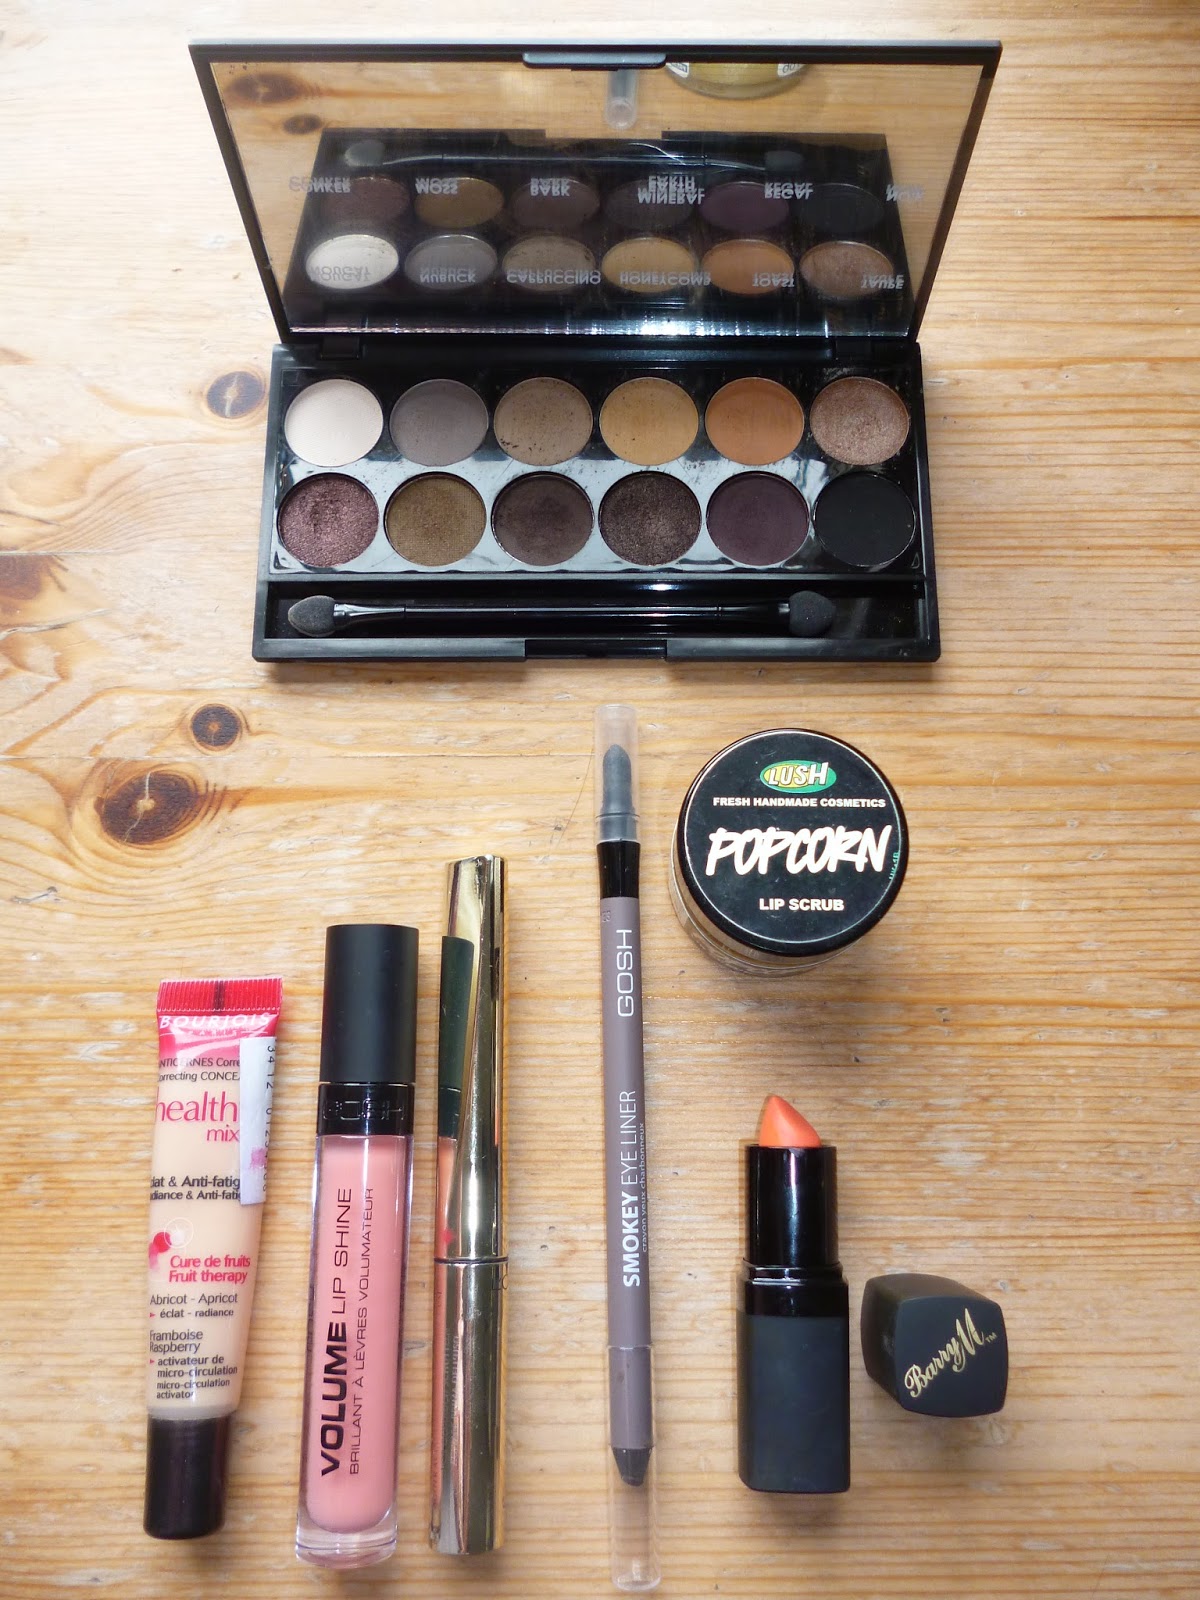
For many of us, and definitely for me, August has been a rather long 5 week month and treating myself to expensive new makeup purchases hasn’t exactly been top of my priority list! However, there is no getting away from the fact that a cheeky new lipstick can make a long day at work just a little bit better. I’ve put together a my favourite beauty buys under a tenner for small beauty indulgences that won’t break the bank but will still make you extremely happy.


I do love Sleek makeup, I think that the quality of their products far exceeds their price point (sshhh don’t tell them) and this palette has been a brilliant buy for me. An absolute bargain at £7.99, the shadows have an amazing colour pay-off and are all extremely wearable. I’ve swatched the black, as a solid black is the best indicator of a quality eyeshadow. These palettes also come in many other colour combinations for the more adventurous, but personally I don’t like straying too far from a brown smokey eye. I was seriously considering the Urban Decay Naked palette but to be honest this is a great cheap alternative. Only downside is that the packaging is a bit flimsy but I can overlook that for the price.


Black swatch


I have mentioned this on here before, but I still love it now a few months on so I thought it deserved a second mention. Brilliant quality for the price tag, its brightening, gives good coverage, and never goes dry around the eye area.


This one was a bit of a shocker for me to be honest. I found this simply because I am a little bit obsessed with peach lipstick. Not coral, oh no, but peach, that pale orangey shade which has proved very difficult to find. I had been lusting after Michavel by Kevyn Aucoin, but decided to go on the hunt for a cheaper alternative and I found this little gem for less than a fiver. It has a nice matte finish, good staying power and a great colour payoff.  I do however recommend using quite a bit of lipbalm on first to ensure it doesn’t dry your lips out.


Easy to smudge


This is a really great pencil, even for contact wearers. It’s soft enough to blend and waterproof, and is fairly smudge proof once it sets.  I'm loving brown rather than black at the moment, its a bit softer and great for daytime. 


I’m having a lipgloss revival at the moment, and these ones from Gosh are lovely. It was the only cheaper brand I could find to cater to my matte peach obsession. It does come in lots of other colours too though, don't worry. 


It's sugary AND salty! And if you have been embracing the matte lip trend this season, chances are you need a little bit of exfoliation as matte lipsticks, as I already mentioned, can be drying. Scrub it on and lick (or wipe) it off for smooth and nourished lips.


Seriously, this is the best liquid eyeliner that I have ever come across and a staple in my makeup bag for a few years now. The felt tip applicator is super easy to use, and extremely good for even the subtlest of lines and flicks. What's more, it never runs, and  the colour is a solid true black. Highly recommended.